Xamarin ve Visual Studio İle IOS Uygulama Geliştirme Bölüm2
Selamlar,
Bugün, bir önceki makalde, IOS ortamı için yazılan uygulama değiştirilip kapsamlı bir uygulama haline getirilecektir. Amaç işe başvuran kişilerin resimlerinin, kendilerine ait açıklamaların ve titlelarının görüneceği ekranın yapılması ve ilgili profiller arasında ileri ve geri hareket edilebilmesidir.
Öncelikle başvuran kişilerin resimlerinin gözükeceği ImageView aşağıda görüldüğü gibi sayfaya sürüklenerek bırakılır.

Kişisel bilgilerin yazılacağı Text View Başlığın hemen altına yerleştirilir.

Sıra geldi UI’da oluşturulan bu 2 objenin kodlarını oluşturmaya. Aşağıda görüldüğü gibi yeni eklene Image View ve Text View “command” tuşuna basılı tutularak “Assistant Editor” sayfasına “GalleryViewController.h” segmesi altında sürüklenerek bırakılır ve kaydedilir.

Windows 10 tarafına geçilip Visual Studio’da “GridViewController.designer.cs” açıldığında, kodların aşağıdaki gibi değiştiği görülebilir.
|
1 2 3 4 5 6 7 8 9 10 11 12 13 14 15 16 17 18 19 20 21 22 23 24 25 26 27 28 29 30 31 32 33 34 35 36 37 38 39 40 41 42 43 44 45 46 47 48 49 50 51 52 53 54 55 56 57 58 |
// WARNING // // This file has been generated automatically by Xamarin Studio to store outlets and // actions made in the UI designer. If it is removed, they will be lost. // Manual changes to this file may not be handled correctly. // using Foundation; using System.CodeDom.Compiler; namespace IphoneGallery { [Register ("GalleryViewController")] partial class GalleryViewController { [Outlet] UIKit.UIButton btnNext { get; set; } [Outlet] UIKit.UIButton btnPrev { get; set; } [Outlet] UIKit.UILabel commandTitle { get; set; } [Outlet] UIKit.UIImageView imgPerson { get; set; } [Outlet] UIKit.UITextView txtDescription { get; set; } void ReleaseDesignerOutlets () { if (btnNext != null) { btnNext.Dispose (); btnNext = null; } if (btnPrev != null) { btnPrev.Dispose (); btnPrev = null; } if (commandTitle != null) { commandTitle.Dispose (); commandTitle = null; } if (imgPerson != null) { imgPerson.Dispose (); imgPerson = null; } if (txtDescription != null) { txtDescription.Dispose (); txtDescription = null; } } } } |
Visual Studio Resources segmesine gelinip proje içinde kullanılacak resimler aşağıdaki gibi eklenir. Eklenen resimlerin uzantısı “.png” olması gerekmektedir. Aksi takdirde ilgili resimler gözükmeyecektir.

Ekenen resimlerin “Build Action”‘ı “BundleResource” olarak secilmelidir.

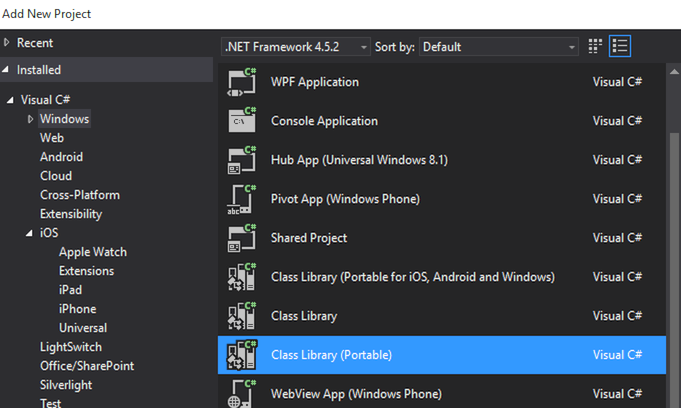
Windows / Portable Class Library altında DAL adında yeni proje aşağıdaki gibi yaratılır.
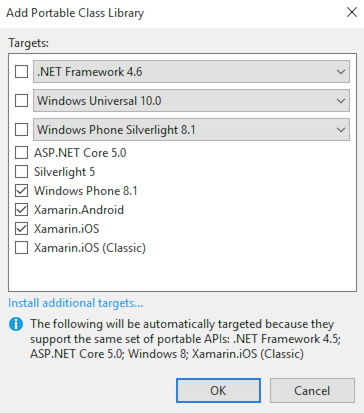
Karşımıza aşağıda görüldüğü gibi, en az 2 tane paltformun seçileceği bir ekran gelir. Mobil platformlar seçilip ilgili sınıf yaratılır.
Yaratılan sınıfın adına “Person.cs” verilir. İlgili kodlar aşağıdaki gibidir.
|
1 2 3 4 5 6 7 8 9 10 11 12 13 14 |
using System; using System.Collections.Generic; using System.Linq; using System.Text; namespace DAL { public class Person { public string Title { get; internal set; } public string Description { get; internal set; } public string Image { get; internal set; } } } |
PersonManager.cs: İlgili sınıfa bağlı olarak dizi döndüren(Person[]) bir başka sınıf, aşağıdaki gibi yazılır.
PersonManager(1):
|
1 2 3 4 5 6 7 8 9 10 11 12 13 14 15 16 17 18 19 20 21 22 23 24 25 26 27 28 29 30 31 32 33 34 35 36 37 38 39 40 41 42 43 44 45 46 47 48 49 50 51 52 53 54 55 56 57 58 59 |
using System; using System.Collections.Generic; using System.Linq; using System.Text; using System.Threading.Tasks; namespace DAL { class PersonManager { private readonly Person[] persons; public PersonManager() { persons = InitPersons(); } private Person[] InitPersons() { var initPerson = new Person[] { new Person() { Title="Iphone for .Net Developers", Description="Provides an overview of the tools uses in Android"+ "development process including the newly relased Android Studio.", Image="person_1" }, new Person() { Title="Front End Developer", Description="Provide users with a rich and interactive experiance "+ "without ever requiring them to open your app.", Image="person_2" }, new Person() { Title="UI Designer", Description="Learn How to capitalize on the Android camera "+ "within your apps to capture still photos and video.", Image="person_3" }, new Person() { Title="Tester", Description="Cove the wide range of Iphone location capabilities "+ "including determining user location, power managment, and"+ "translating location to human-readble addresses", Image="person_4" }, new Person() { Title="DB Admin", Description="Check the datas and optimization"+ "including get reports and back all files"+ "fixed index and give support with remote debug", Image="person_5" } }; return initPerson; } } } |
Aşağıda görüldüğü gibi başlangıç durumunda gidilecek ilk eleman, bir sonraki veya bir önceki elemanı belli koşullara göre seçen methodlar ve son olarak bulunan geçerli Person sınıfını alıcak method aşağıdaki gibi tanımlanmıştır.
PersonManager(2):
|
1 2 3 4 5 6 7 8 9 10 11 12 13 14 15 16 17 18 19 20 21 22 23 24 25 26 |
int currentIndex; public void MoveFirst() { currentIndex = 0; } public void MoveNext() { if(currentIndex<persons.Length-1) { currentIndex++; } } public void MovePrev() { if(currentIndex>0) { currentIndex--; } } public Person Current { get { return persons[currentIndex]; } } |
Yukarida yazilan DAL projesinin var olan “IphoneGallery” projesine eklenebilmesi için yeni bir “Map Network Drive”‘ın aşağıda görüldüğü gibi oluşturulması gerekmektedir. Aksi takdirde ilgili yola göre DAL projesine erişilememektedir.

GalleryViewController: Kodlar ilgili kütüpahane de kullanılarak, aşağıdaki gibi değiştirilir.
- PersonManger tipinde manager tanımlanır.
- UpdateUI() methodu ile current yani geçerli Person’ını “Title”,”Description” ve “Image”‘ı basılır.
- ViewDidLoad() methodunda MoveFirst() ile ilk kayda gidilir. Ve UpdateUI() methodu çağrılarak ilk kayıt bilgileri ekrana basılır.
- “BtnNext” ve “BtnPrev” buttonlarına basılarak bir önceki ve bir sonraki kayda “manager.MovePrev()” ve “manager.MoveNext()” methodları ile gidilir ve UpdateUI() methodu ile ekrana basılır.
- Resimler ekrana Android uygulamaya göre çok daha kolay bir şekilde text isimlerinden bulunarak “UIImage.FromBundle()” methodu kullanılarak ekrana basılmaktadır.
|
1 2 3 4 5 6 7 8 9 10 11 12 13 14 15 16 17 18 19 20 21 22 23 24 25 26 27 28 29 30 31 32 33 34 35 36 37 38 39 40 41 42 43 44 45 46 47 48 49 50 51 52 |
using System; using UIKit; using DAL; namespace IphoneGallery { public partial class GalleryViewController : UIViewController { PersonManager manager; public GalleryViewController() : base("GalleryViewController", null) { } public override void DidReceiveMemoryWarning() { base.DidReceiveMemoryWarning(); // Release any cached data, images, etc that aren't in use. } public override void ViewDidLoad() { base.ViewDidLoad(); btnPrev.TouchUpInside += BtnPrev_TouchUpInside; btnNext.TouchUpInside += BtnNext_TouchUpInside; manager = new PersonManager(); manager.MoveFirst(); UpdateUI(); // Perform any additional setup after loading the view, typically from a nib. } private void BtnPrev_TouchUpInside(object sender, EventArgs e) { manager.MovePrev(); UpdateUI(); } private void BtnNext_TouchUpInside(object sender, EventArgs e) { manager.MoveNext(); UpdateUI(); } private void UpdateUI() { commandTitle.Text = manager.Current.Title; imgPerson.Image = UIImage.FromBundle(manager.Current.Image); txtDescription.Text = manager.Current.Description; } } } |

Şimdi sıra geldi önceki ve sonraki buttonlarının duruma göre aktif pasif yapmaya. Öncelikle “DAL” projesinde “PersonManager.cs” sınıfına aşşağıdaki propertyler eklenir.
|
1 2 3 4 5 6 7 8 9 10 11 12 13 14 15 |
public bool CanMovePrev { get { return currentIndex > 0; } } public bool CanMoveNext { get { return currentIndex < persons.Length - 1; } } |
Yukarıdaki propertylerden yola çıkarak “GalleryViewController” sınıfıdaki UpdateUI() methodu aşağıdaki gibi güncellenir.
|
1 2 3 4 5 6 7 8 9 10 11 12 13 14 15 16 17 18 19 20 21 22 23 24 25 26 27 28 29 30 |
private void UpdateUI() { commandTitle.Text = manager.Current.Title; imgPerson.Image = UIImage.FromBundle(manager.Current.Image); txtDescription.Text = manager.Current.Description; if (!manager.CanMoveNext) { btnNext.Enabled = false; btnNext.SetTitleColor(UIColor.GroupTableViewBackgroundColor, UIControlState.Disabled); } else { btnNext.Enabled = true; btnNext.SetTitleColor(UIColor.Blue, UIControlState.Disabled); } btnPrev.Enabled = manager.CanMovePrev; if (!manager.CanMovePrev) { btnPrev.Enabled = false; btnPrev.SetTitleColor(UIColor.GroupTableViewBackgroundColor, UIControlState.Disabled); } else { btnPrev.Enabled = true; btnPrev.SetTitleColor(UIColor.Blue, UIControlState.Disabled); } } |
Yukarıda görüldüğü gibi herbir yeni kayıt çekildiğinde o anki geçerli konumuna göre “CanMovePrev” ve “CanMoveNext” propertylerine göre Önceki(btnPrev) ve Sonraki(btnNext) buttonları enabled yada disabled hale getirilir. Ayrıca arka renkleri koşula göre değiştirilir.
Böylece basit bir Iphone uygulamasını baştan sona kodladık. UI tarafını XCode ve Xamarin kullanıp Mac Os X ortamında oluşturduktan sonra, Windows 10 tarafında Visual Studio kullanarak kodlamasını tamamladık. Mac Os X tarafında XCode ile açılan similator ile ilgili uygulama test edilip gerekli çalışmalar yapılmıştır. Geldik bir makalenin daha sonuna. Yeni bir makalede görüşmek üzere hoşçakalın.
Source: https://www.pluralsight.com/courses/cross-platform-ios-android-visual-studio-csharp


Son Yorumlar